September 11, 2026
PiKVM Review: The V4 Plus Tested, and the Whole V4 Lineup
The most powerful, most open, and most expensive IP KVM. We measured it, opened it, and ran it for weeks.
By Andrew Douglass · Founder
Disclosure: Our articles contain affiliate links, including Amazon. If you buy through one, we may earn a commission at no extra cost to you, and as an Amazon Associate we earn from qualifying purchases. It never affects our testing, measurements, or verdicts. Full disclosure.
This PiKVM review is based on our own V4 Plus: measured on the bench, opened on the workbench, and run for weeks on a real machine. Short version: it is the most capable and most mature IP KVM you can buy, built on the open-source software that started this entire category, and it is also the most expensive by a wide margin. Whether that trade is worth it depends entirely on how much you value the ecosystem over the raw job.
A KVM over IP gives you keyboard, video, and mouse control of a machine at the hardware level, below the operating system, so you can reach a server stuck in BIOS or mid-reinstall. PiKVM is the project that made this accessible on a Raspberry Pi, and the V4 is its polished, pre-built flagship.
The verdict up front
The V4 lineup: Plus, Mini, and DIY
PiKVM sells the V4 in two pre-built forms, and the software runs on several older and homemade variants too.
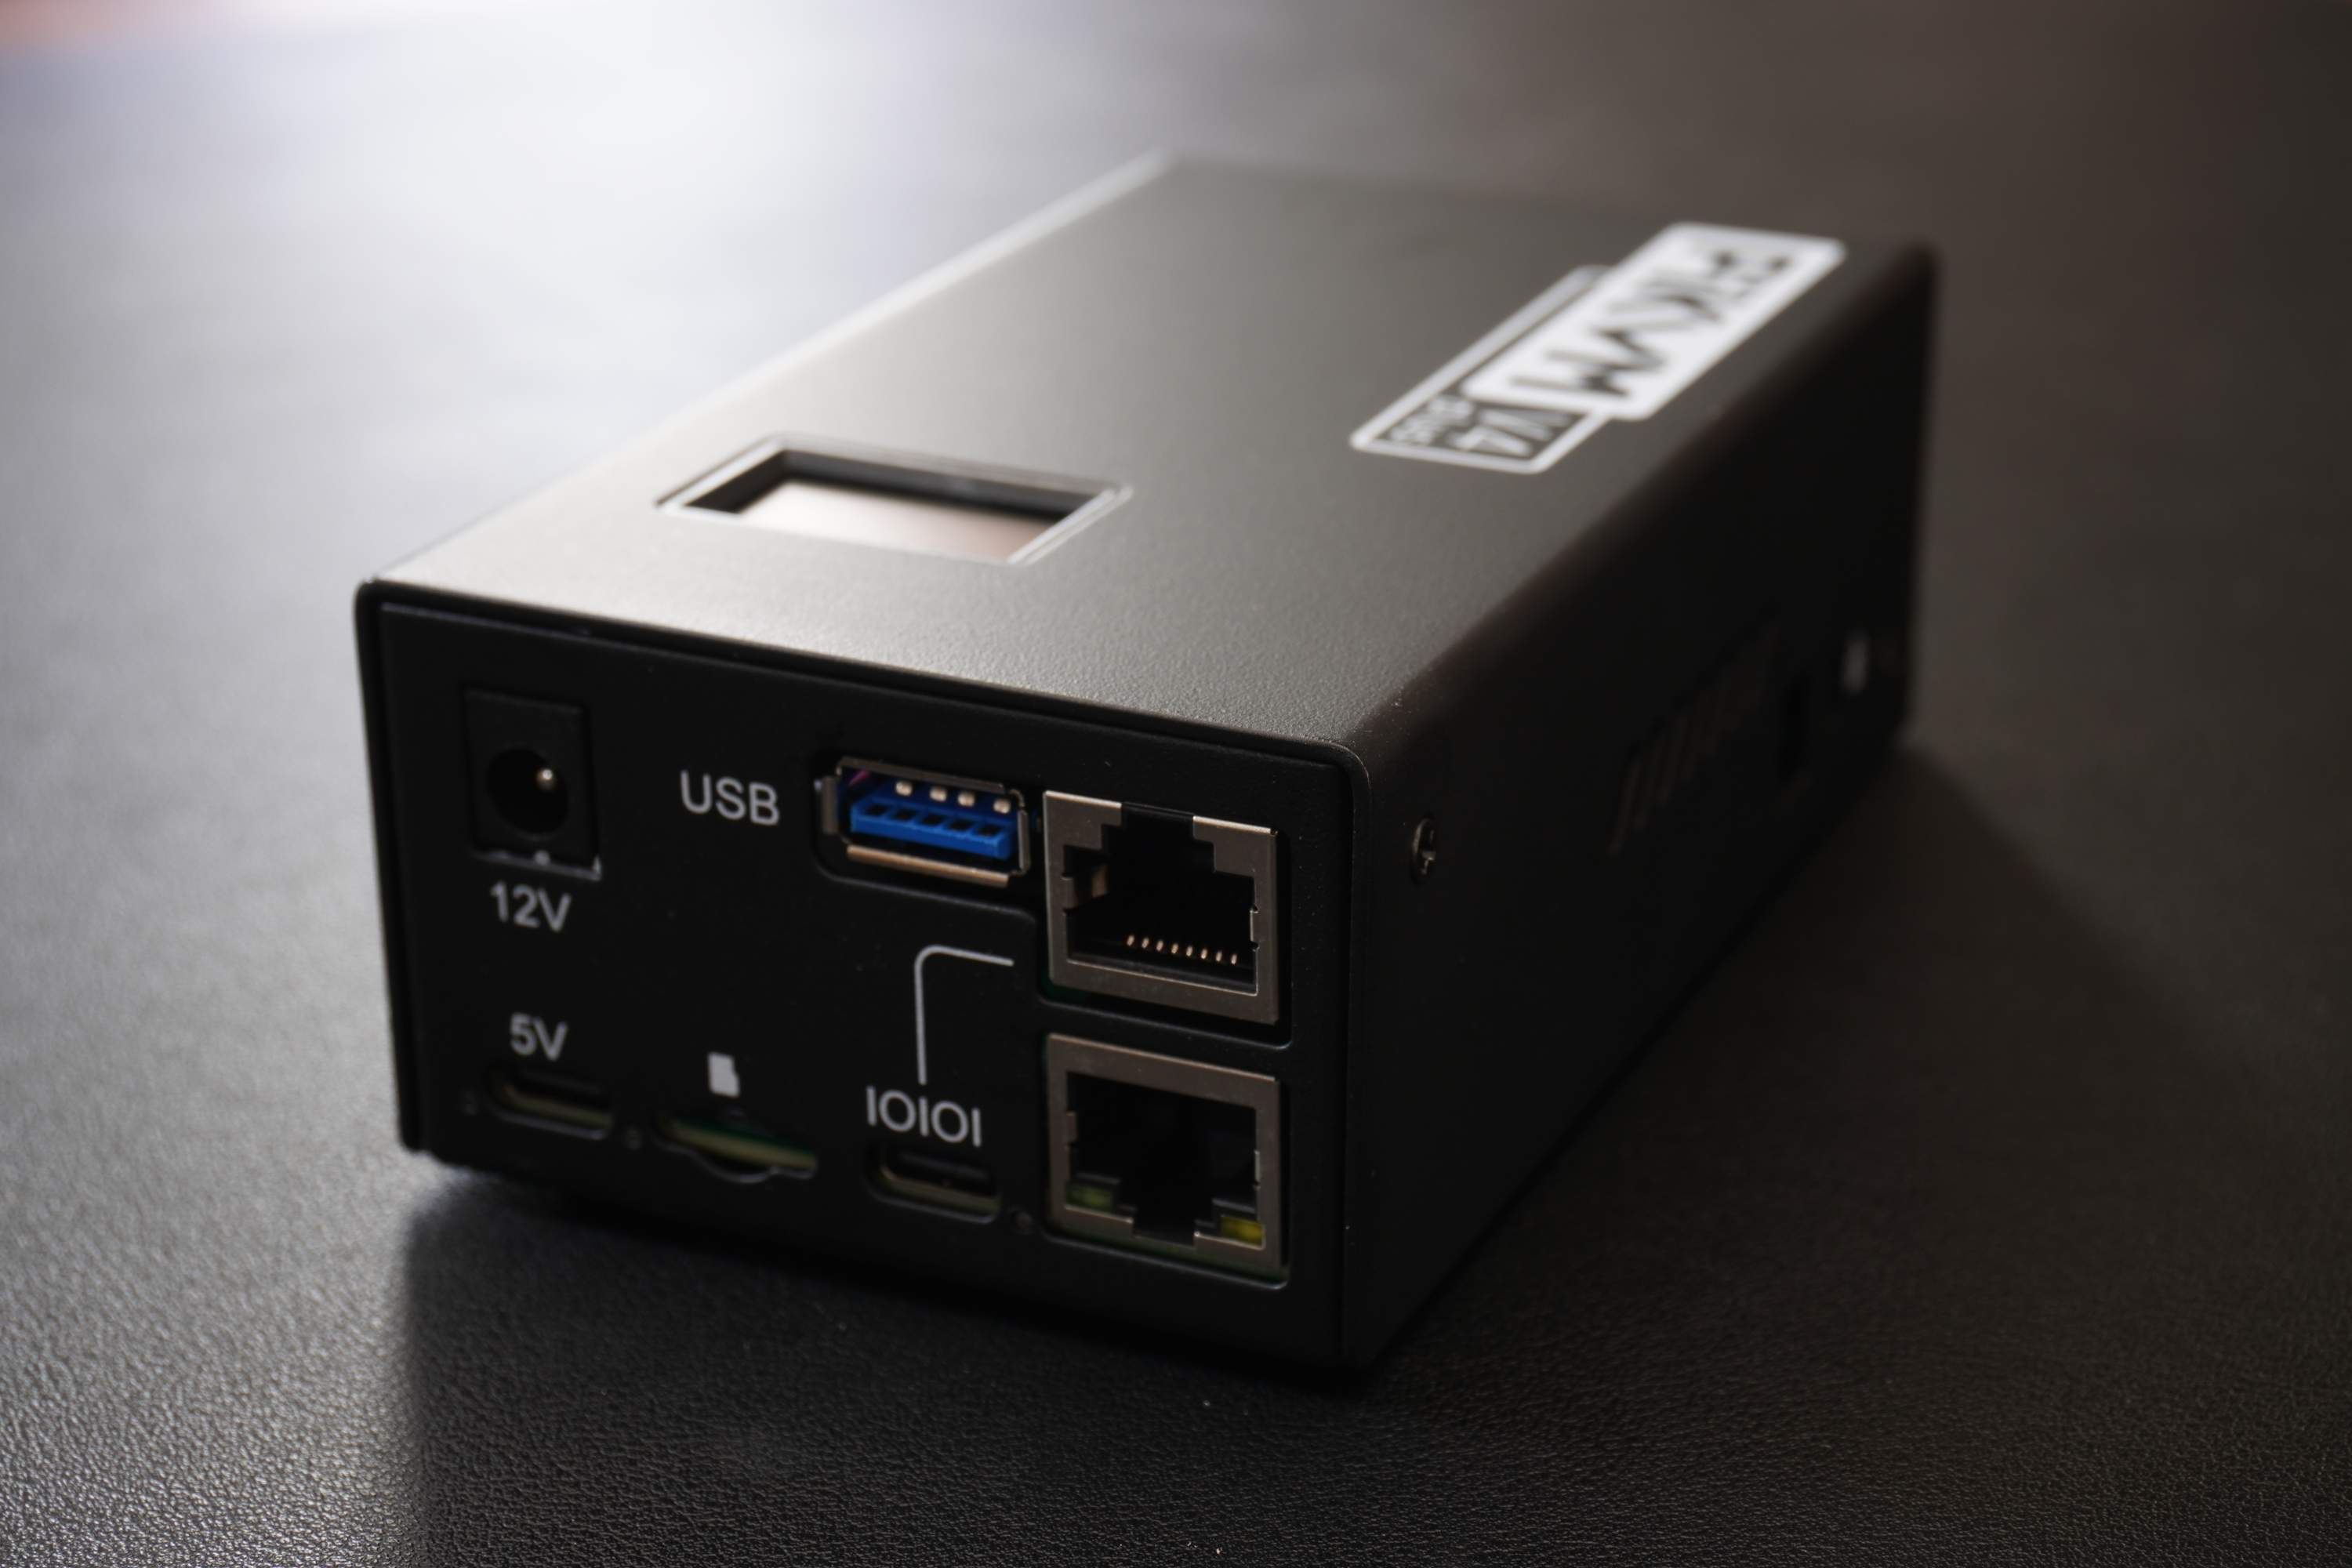
- V4 Plus (around $400) is the flagship: aluminum case, active blower-fan cooling, an OLED info display, a real-time clock, ATX power control, and a mini PCIe slot plus SIM tray for an optional 4G LTE modem. This is what we tested.
- V4 Mini (around $275) is the same core in a smaller case without the OLED, LTE slot, or some I/O. For most people it is the sensible buy.
- DIY is the original path: flash the open-source PiKVM OS onto a Raspberry Pi 4 or a CM4 with an HDMI-to-CSI capture board (from Geekworm and others) and build your own. It is cheaper and it is how the project started, but you assemble and support it yourself.
Earlier V2 and V3 hardware still runs current software; the big jump to the V4 was moving from a Raspberry Pi 4 to the Compute Module 4, which is what unlocked reliable 60Hz capture.
Build quality and what is inside
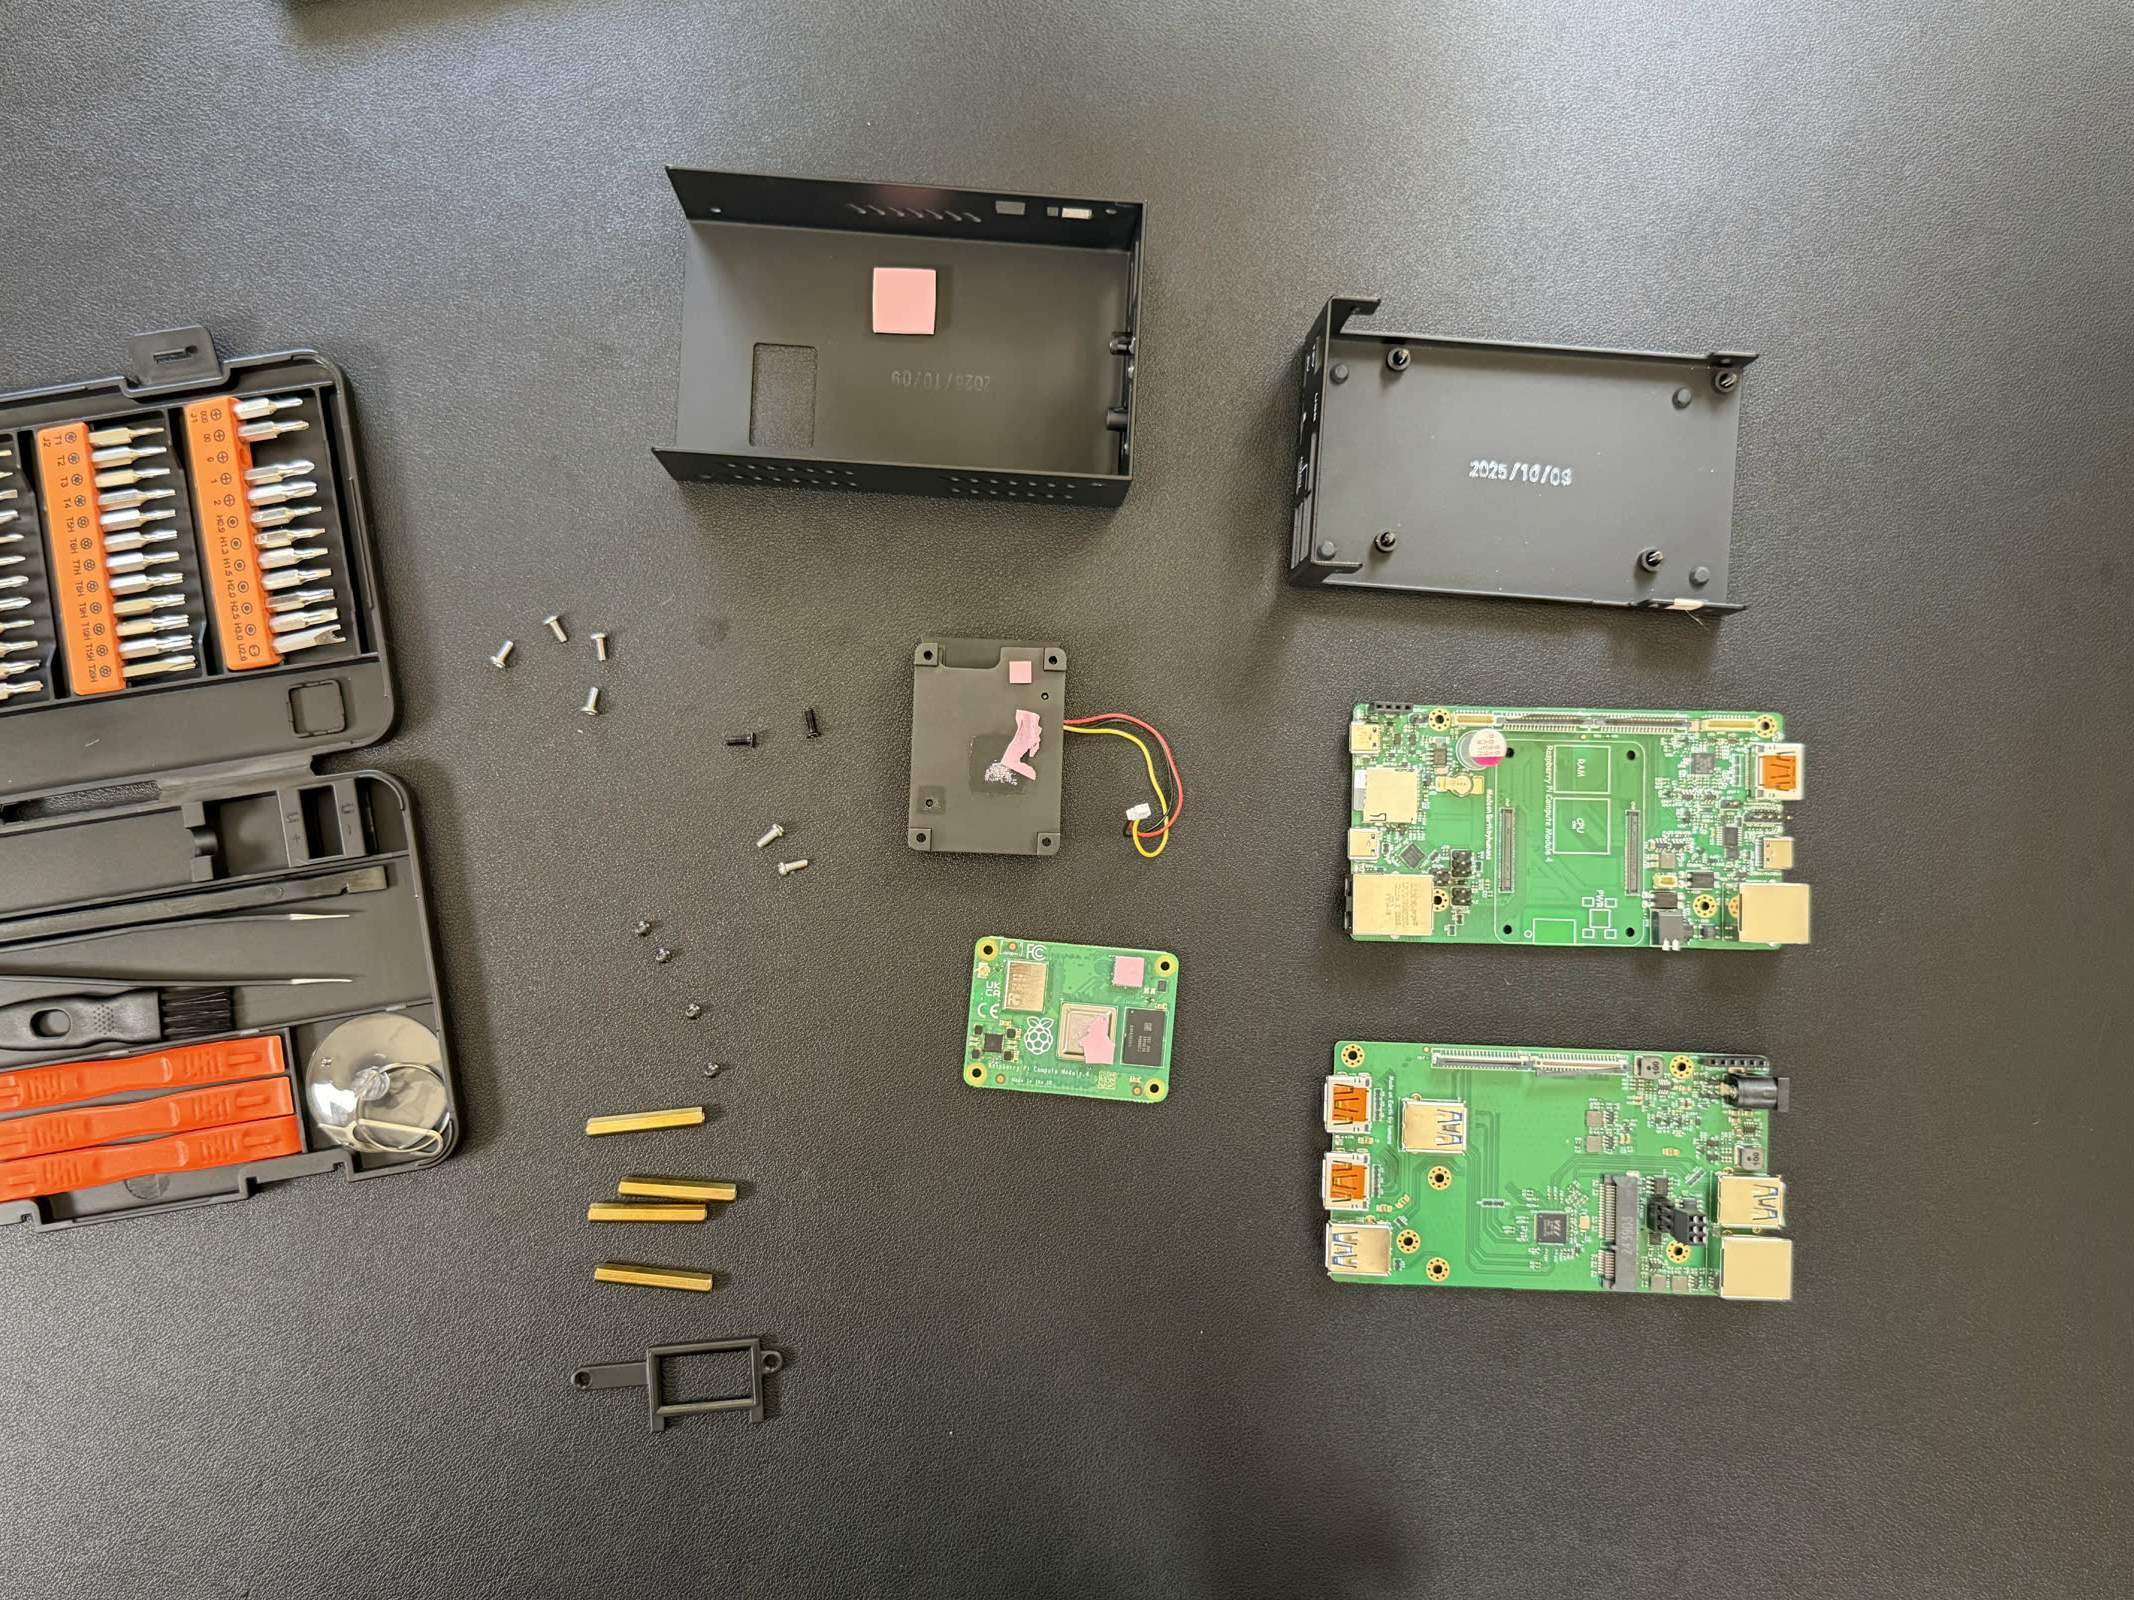
We opened ours. Inside is a genuine Raspberry Pi CM4 (a Broadcom BCM2711 with a quad-core Cortex-A72 and 2 GB of RAM), which is the most powerful processor and the most memory of any small IP KVM we tested. HDMI is captured by a Toshiba TC358743 bridge into the Pi's CSI camera interface, the proper low-latency path rather than the USB capture dongles some rivals use. It boots from a genuine SanDisk microSD dated late 2024, on a CM4 Lite with a read-only root filesystem, running Arch Linux ARM on a current kernel, the newest OS stack in the field.
The aluminum case with its blower fan keeps temperatures in hand, and the build feels industrial. One thing the teardown makes clear and that matters for longevity: the CM4 is a socketed, replaceable module. Alongside the TinyPilot, this is the only small IP KVM whose brain you can actually swap. Our full PiKVM V4 Plus teardown has the board photos; the one fiddly part is an H-shaped ribbon cable.
Setup and installation
For a pre-built unit, first setup took us 3 minutes 17 seconds to a working stream, in the middle of the pack. The friction came after. Two things are worth knowing before you buy.
First, firmware updates are SSH-only. There is no update button in the web UI; you log in over SSH (the documented root process) and update from the command line, which took us over ten minutes and is a step the newcomers have automated in their GUI. Second, HDMI passthrough refused to work at first, and after a long hunt the cause was the HDMI cable, not the device or a setting. The Raspberry Pi is noticeably less tolerant of marginal HDMI cables than the other KVMs we tested, so if capture is black, swap the cable before you swap anything else.
Software and the ecosystem
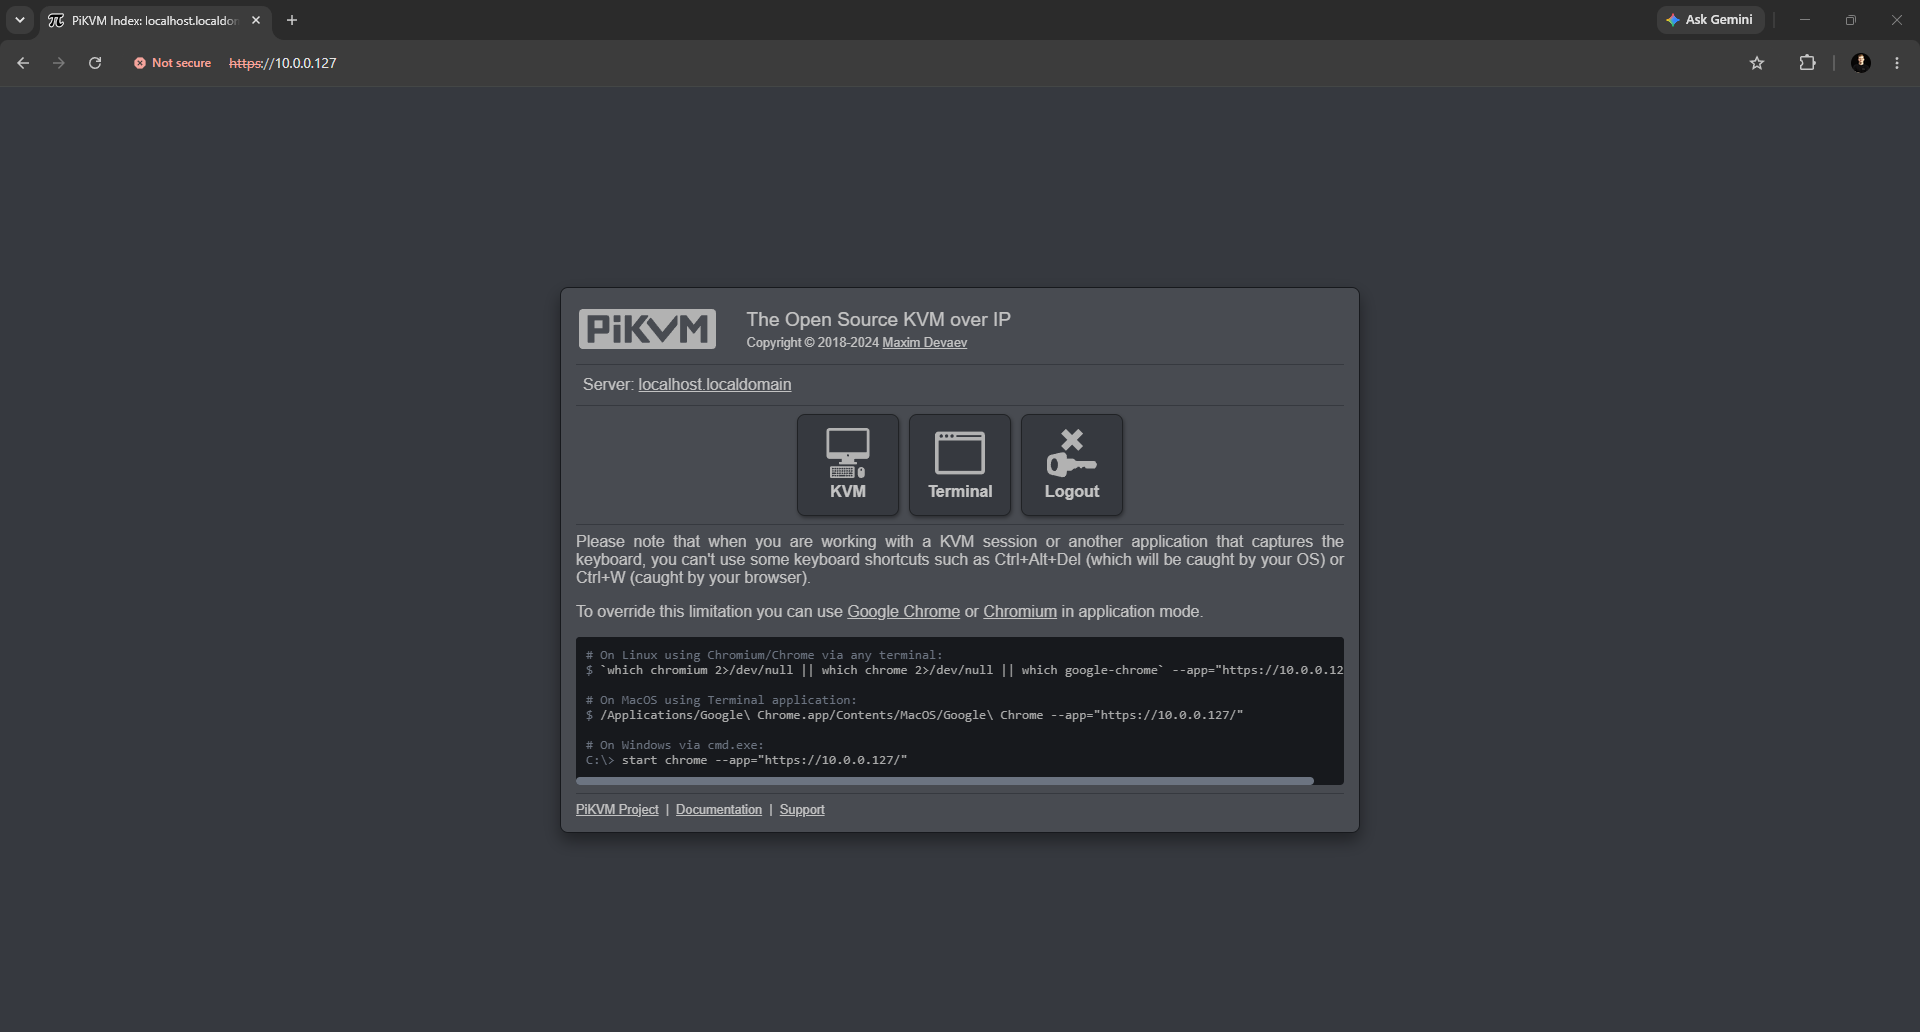
Software is where PiKVM earns its reputation. The kvmd daemon and HTML5 interface are the most mature and best-documented in the category, with no client software to install and streaming over MJPEG or H.264. It does things the cheaper devices are still catching up to: robust EDID handling, two-way audio, proper ATX power control with front-panel passthrough (so the case buttons still work), virtual media to mount an ISO as a USB drive for a remote OS install, MQTT and Home Assistant hooks, and on the Plus, that optional LTE modem so a colocated box stays reachable with no other network. It is the platform third-party developers build on, and other vendors quietly run its software.
The move to the CM4 is the single biggest V4 improvement. On the Raspberry Pi 4, capture was limited to 50Hz, which locked many owners out of BIOS screens and Android devices that demand 60Hz. The CM4's higher-bandwidth CSI bridge fixed that, and it is the upgrade owners mention most.
Performance: latency, video, and power
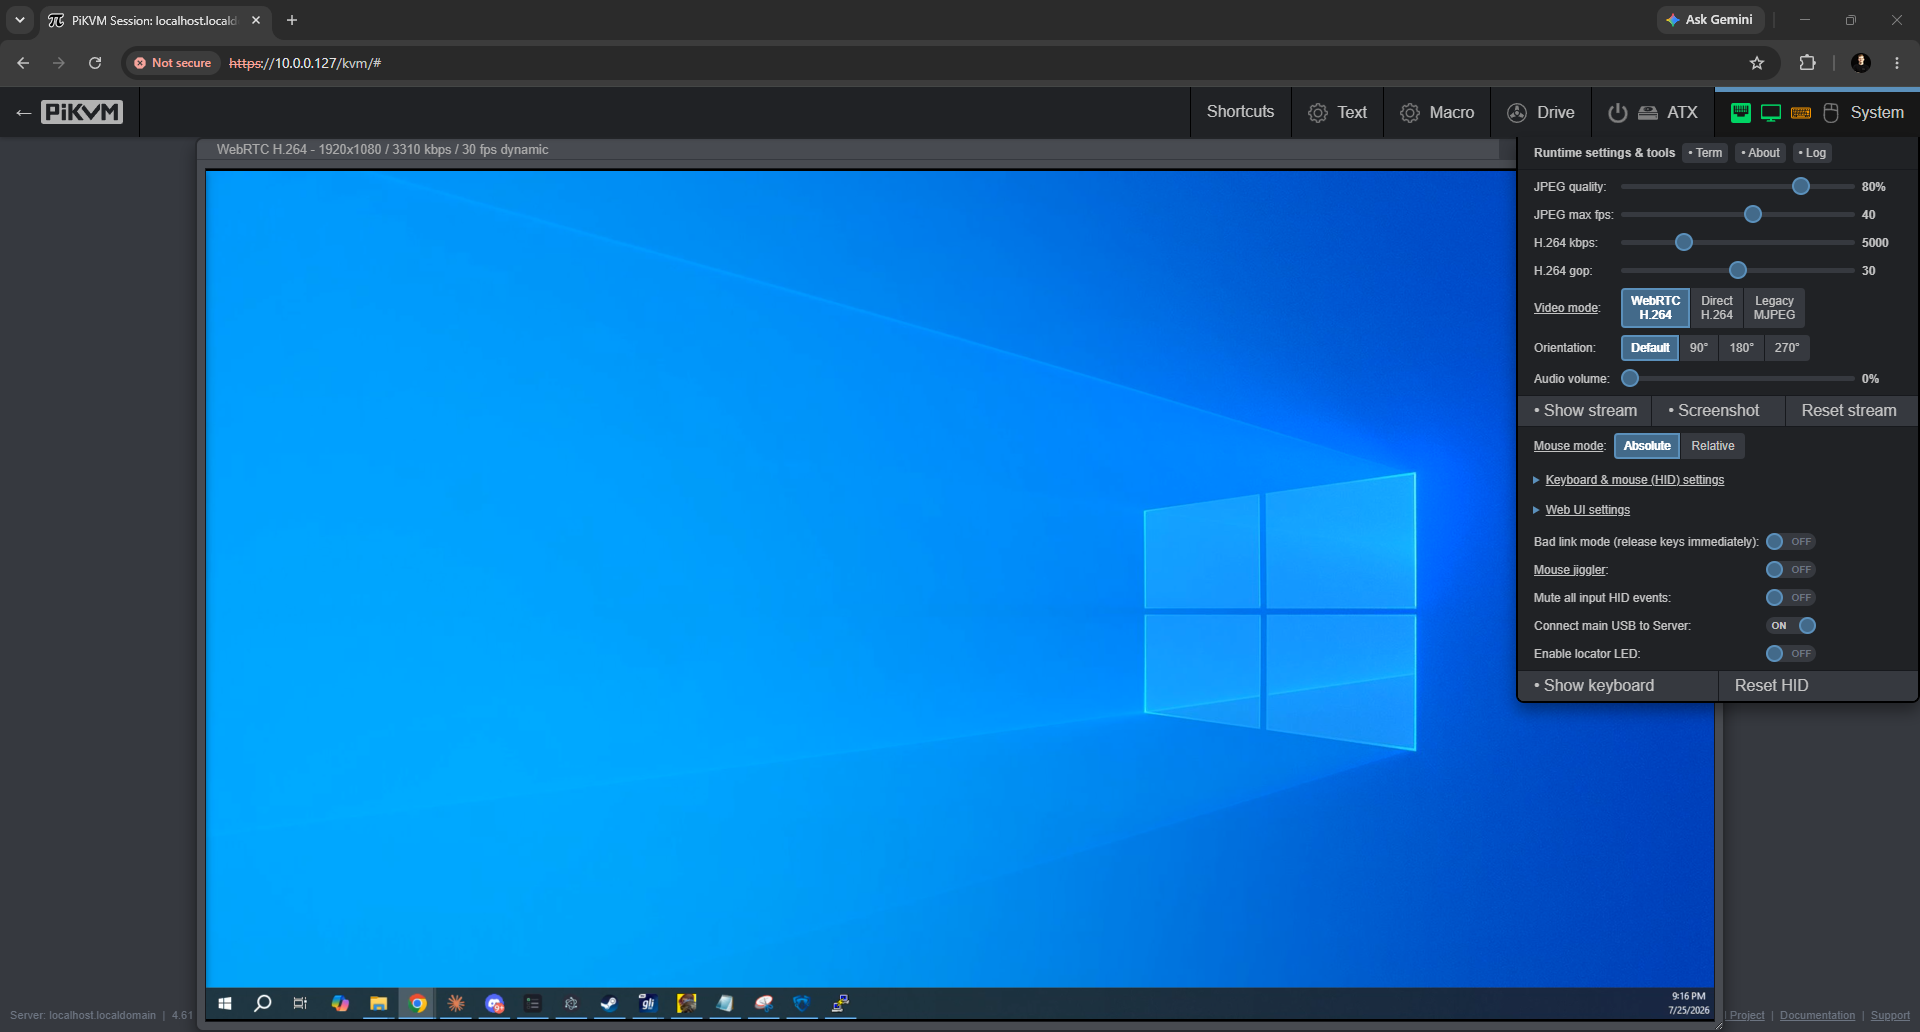
On our bench the PiKVM V4 Plus measured about 69 ms click-to-photon at 1080p60 on a wired LAN, the fastest of the premium quad-core devices we tested. In practical terms it is responsive: BIOS work, installs, and console tasks feel immediate. The ceiling is resolution, not speed. The TC358743 capture chip is HDMI 1.4, so the V4 tops out at 1080p with no 4K, which is fine for servers but a real limit if you need a high-resolution desktop. We set it to 60fps and saw a dynamic 30fps under load.
The cost of that quad-core Pi is power. The V4 Plus drew 3.53 W while streaming and peaked near 5 W at boot, the highest of the small KVMs we measured. For a device that runs constantly it is still under five dollars a year, but it is not the efficient choice. Full numbers are in our IP KVM latency benchmarks and power comparison.
Multiple machines: the PiKVM Switch
A single PiKVM controls one machine, but the PiKVM Switch extends it to up to four ports per switch, and you can daisy-chain up to five switches for as many as 20 machines, with firmware updates cascading down the chain. It is a genuine multi-machine solution, but it is a separate purchase at around $250, which feeds straight into the main complaint about this platform.
What owners say, and the price debate
Across three in-depth video reviews and roughly 75 owner comments we analyzed, the praise is consistent: the aluminum build, the 60Hz fix, the LTE option, and a web UI smooth enough that reviewers watch video through it. The complaint is equally consistent, and it is price. Owners repeatedly note that a PiKVM plus a switch costs more than the machines it manages. One put it as $84 per port for a 16-port enterprise KVM against roughly $400 per port for a PiKVM; another observed that $250 for the switch buys five NanoKVMs or JetKVMs.
“This looks cool, but for $250 you could also get 5+ dedicated NanoKVM or JetKVM devices.”
That is the honest tension. PiKVM is not trying to be the cheap option. You are paying for the most complete open-source stack, the deepest documentation, and the fact that buying it supports the project whose software the whole category is built on.
Alternatives
| Device | Price | Max video | Open source | Notable |
|---|---|---|---|---|
| PiKVM V4 Plus | ~$400 | 1080p60 | Yes (GPLv3) | Most mature ecosystem, ATX + LTE, swappable CM4 |
| PiKVM V4 Mini | ~$275 | 1080p60 | Yes | Same core, fewer extras; the sensible PiKVM |
| JetKVM | ~$103 | 1080p60 | Yes | Best software polish per dollar, mid-pack latency |
| Sipeed NanoKVM | Under $50 | 1080p (Pro: 4K) | Partial | Cheapest; security and support caveats |
| GL.iNet Comet Pro | ~$159 | 4K30 | No | 4K, Wi-Fi, touchscreen; closed source |
If you want the capability and the ecosystem, nothing matches PiKVM. If you want most of the result for a quarter of the money, the JetKVM is the value benchmark, and our JetKVM vs PiKVM head-to-head covers exactly where the extra spend does and does not pay off. If you need 4K, the closed-source GL.iNet Comet Pro is the one to look at.
FAQ
FAQ
Hardware-level remote control of a computer: keyboard, video, and mouse over the network, working below the operating system. That means BIOS and UEFI access, remote OS installs via virtual media, and recovering a machine that is frozen or off the network, on hardware that has no built-in IPMI or iDRAC.
The pre-built V4 Plus is around $400 and the V4 Mini around $275. A DIY build on a Raspberry Pi 4 or CM4 with a capture board is cheaper but you assemble and support it yourself. The optional PiKVM Switch for multiple machines adds around $250.
Yes. PiKVM is open source, and the OS flashes onto a Raspberry Pi 4 or a CM4 paired with an HDMI-to-CSI capture board (Geekworm and others sell kits). It is the original path and the cheapest, in exchange for doing the assembly and support yourself.
The JetKVM (around $103) for most of the capability at a quarter of the price, the Sipeed NanoKVM (under $50) if price beats everything, and the GL.iNet Comet Pro if you need 4K and can accept closed-source software. See our full comparisons for where each one wins.
No. The V4 captures through a Toshiba TC358743 bridge that is HDMI 1.4, so it tops out at 1080p60. If you need 4K capture, look at the Sipeed NanoKVM Pro or the GL.iNet Comet Pro instead.
Bottom line
We measured the numbers behind this review ourselves. See the teardown for the internals and the latency benchmarks for how it stacks up against every other device we tested.